I recently - randomly - bought myself a neptUNO FPGA machine, which is somewhere between a MiST and a MiSTer machine.
The neptUNO works well as a middle weight retro gaming/platform machine. It can run Spectrum (and the new Spectrum Next), C64, NES, Megadrive, SNES, PC Engine, Amiga 500, Vectrex, original arcade like Galaxian and Bubble Bobble and some more. To run the "core" it does require that someone has written the code to program the FPGA but there's a pretty good collection already available.
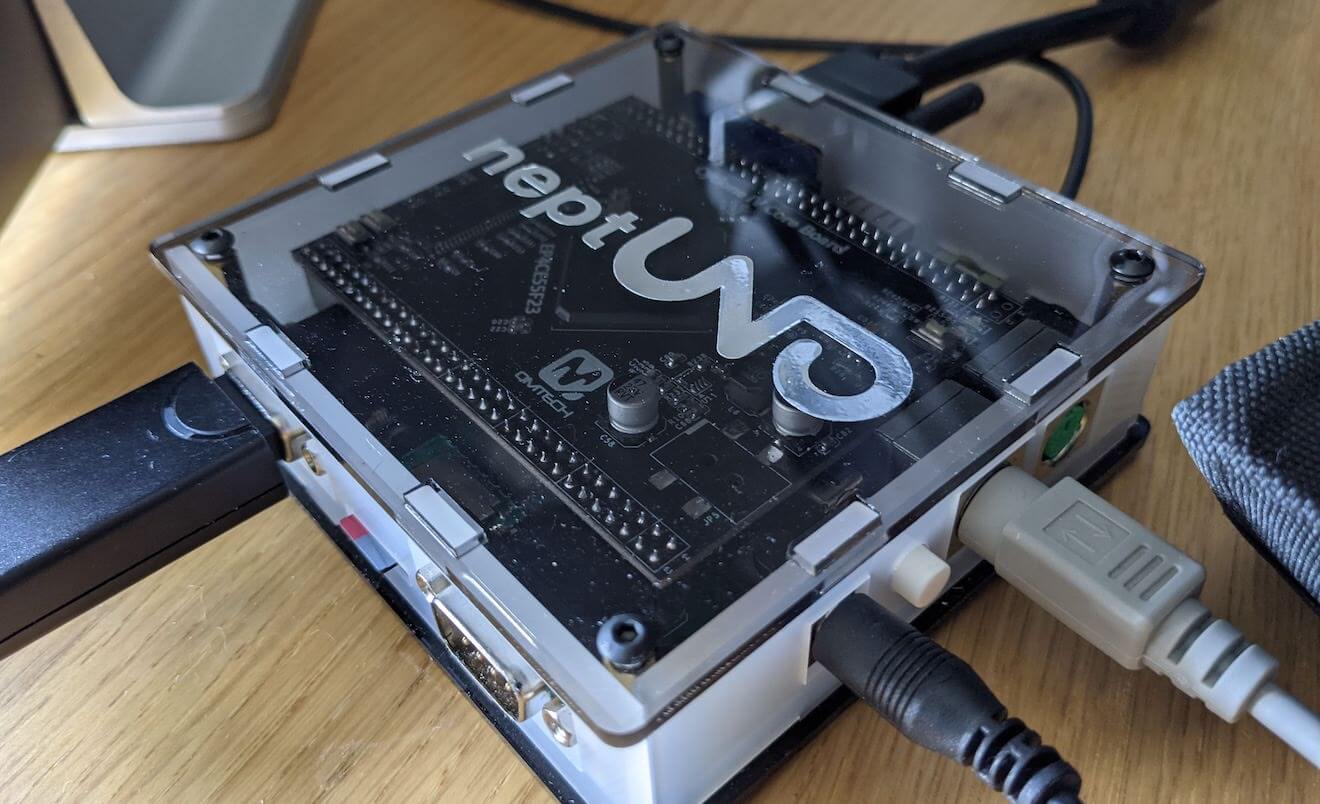
What appealed to me was that firstly it was all prebuilt (I'd learnt a little about the MiSTer machines but it seemed I needed to find the right parts and put it together, and goodness knows I'd frankenstein mine!), but also €150 (plus postage) wasn't too tough on the wallet.
Getting set up however is a bit of wild west situation, partly because it's new, partly because it's fairly unique. So I've written up my notes, either to help remind myself in years to come or for other english readers (there's a lot of resources in spanish).
Contents
Getting started
Things you'll need:
- SD card - class 10 is generally better all round
- keyboard either: with a PS/2 port or "non active" USB port (more on this later)
- DB9 compatible joystick/pad - this megadrive one is particularly popular
- VGA monitor (or VGA to HDMI converter - make sure that it's VGA to HDMI)
On the SD card, drop the contents of the binaries repo into it. The core files use the extension np1 and it doesn't really matter where they live - but it does matter where their dependencies live - I'll come on to this.
There's also Victor Trucco's repo (also known for the Spectrum Next FPGA efforts) and he's been working on arcade machine cores (as well as a PC Engine and SNES).
I've personally put the binaries directory in a root directory called /_System/ - this is just so it appears at the top of the boot menu (which is, from what I can tell, just a file browser).
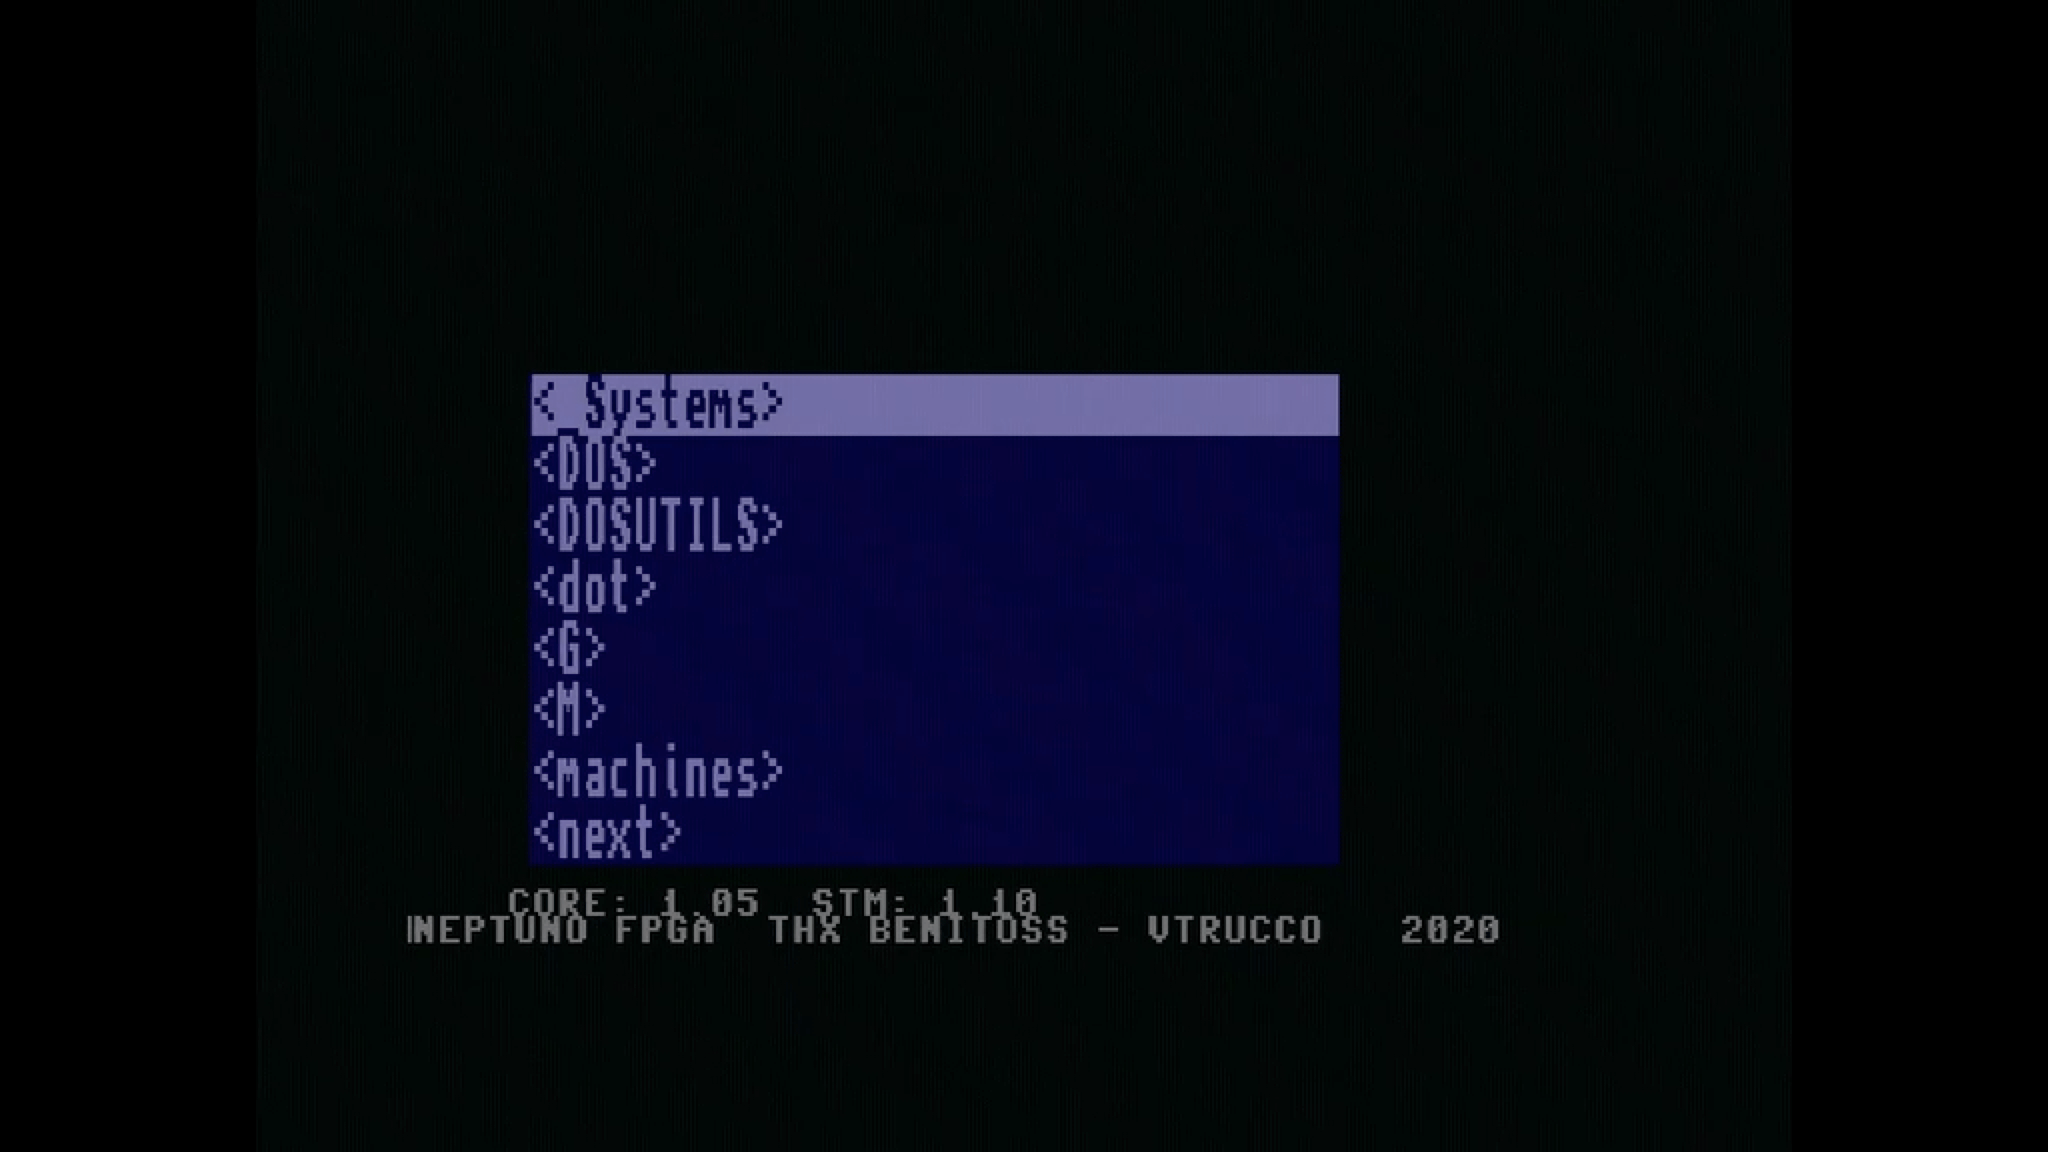
(excuse the crunchy image, something was up with my capture device)
Navigating the menu can be done using a joystick/joypad or the keyboard, but you will need a keyboard to proceed with any of the cores.
Keyboards
There seems to be a lot of hit and miss out there with respect to keyboards. I've got four(!) keyboards and they work at varying degrees, to the point where I've built my own solution for use with any keyboards.
I can explain why they don't work, but it's a detail that you (probably) won't find on a product page.
This is what's important for your keyboard:
- If it's USB, it must not have any "active" components, like a USB hub (which tends to be the give away)
- It really wants F12 and scroll lock as real buttons, not "function buttons" (where you press an FN key to access it)
- If it's PS/2 it's probably better if it's an older model - in my experience they tend to be a bit more flexible with respect to operation, which gives you a higher chance of it working
This USB keyboard (archive version for reference) is an absolute bargain for £3.24p, but if you look closely you'll see that the F12 is access using the FN modifier key, and the neptUNO doesn't recognise it at all.
A note on PS/2 keyboards - not all keyboards are built equally. After digging into how these work, some PS/2 keyboards won't work until they get an ack message from the machine (the "host"). I bought a Perixx PS/2 keyboard (amazon link - non affiliate) which doesn't work because the keyboard itself sends a "BAT" message and won't work until it's replied to - which the neptUNO core doesn't do (yet).
Important keys
F12- brings up the OSD. This can be used to load roms into the core and change settings.Scroll lock- switches between (I believe) VGA and 15Hz mode - so when my monitor doesn't get a signal (the Amiga core starts like this for me) hittingscroll lockswitches the mode and the signal will work again.1- for arcades, starts 1 player mode2- for arcades, starts 2 player mode5- for arcades, adds coin 16- for arcades, adds coin 2
F12 is common amongst the cores, which is why it's important to have a keyboard that actually has this key.
Note that for the arcade cores, using the "select" joypad button also acts as "add coin" and "start" will start the game.
Cores
The cores (sort of) split between: arcade (stand alone), console (just need a ROM) and computers (which have dependencies).
For organisation, I tend to put the console ROMs in the console core directories (i.e. NES games in my NES core directory).
Computer cores have different requirements, but most (or all that I've tested so far) require boot files available in the root of the SD card, which makes things a little messy, but it works.
I've only documented those that I've actually used.
ZX Next
Although the neptUNO comes with cores for the Spectrum 48K and the 128K - the Spectrum Next fully replicates these machines so, for me, it's the only core I need for running Spectrum games. I own a "real" Spectrum Next, but under the hood it's also an FPGA chip, so from a software perspective, I've not noticed and differences.
You'll need the TBBLUE.FW and related OS files. All of these can be download from the ZX Next gitlab repo.
If you want a minimum setup, you'll need the following files:
TBBLUE.FWTBBLUE.TBU/sysdirectory/nextosdirectory/machinesdirectory/dotdirectory
Otherwise, grab the entire repo and deploy on the SD card - there's some great demos included in the ZX Next project too.
You can (and should) also download the ZX Next manual.
Amiga
When I was a kid my best friend owned an Amiga and it was a different take on games, and when I was around his house we'd play games like Speedball, Syndicate, James Pond and the like.
There's two Amiga cores available:
- Amiga AGA
- Amiga AGA RTG
I've generally stuck with the RTG version (it's supposed to have better graphics - I don't know the Amiga well enough to know though).
In the RTG directory you'll need to decompress the SD25_12_2020.rar into the root of the SD card to get the core to load.
The neptUNO project is mostly (if not entirely) supported by the spanish community, so the Amiga OSD menu is in spanish. For me I needed it in English (though I could just about understand the menu items).
For english language you can download any of the latest zip files from here and unzip and grab 832OSDAD.bin then rename it to minimig.bin and add this to the root of your SD card.
I found that this video, although for MiSTer, it's a pretty good guide on how to configure MiniMig for the Amiga.
Atari 800 XL
In the Binaries/Computers/Atari800XL/ directory is Atariroms.rar - this needs to be decompressed into /atari800 in the root of the SD card. This should give you a path of /atari800/rom/.
This computer needs some attention to keys, but these are all documented, the additional important keys (beyond F12 and scroll lock) are:
F6- startF7- selectF8- option (hold this button and pressF9to reset without BASIC loaded - which apparently makes more games load)F9- resetF10- cold reset
To load cartridges and disk you need to use F12 and load up the port by selecting a file on the SD card. Use cursor right on the first menu, then enter to select on the file browse menu. Loading a cartridge and exiting the OSD then immediately loads the cart (as if the Atari had been turned on with it inserted).
If loading a disk position with a game, the Atari is supposed to let you boot from the drive. If the game is a non-BASIC game (i.e. fairly likely), then you need to reboot with (hold) F8 and press F9. I've had mixed success, sometimes it boots right back to "READY" but other times it will load.
In general I've assumed the .ATR and .XEX games are non-BASIC games.
Non alphabetical letters are found mostly in the same position as a PC keyboard, i.e. " is found at shift+2.
Next186
The Next186, to me, is a PC DOS system from bygone days. I had a 286, 368, 486 and upwards but these are the PCs that I got to play games like Beneath a Steel Sky or Day of the Tentacle.
First point to note: I've not managed to get this core to boot without using a completely separate SD card (so maybe have a few spare).
So although the BIOS is in the Next186 binaries directory, you're better off getting a full SD card image from here (the .rar file). Write that entire image using a tool like Etcher and once that's complete, copy the Next186_SoC.np1 file into the new SD card. Now the with this new SD card the Next186 core can be loaded.
I did notice that my PS/2 keyboard was not compatible with DOS at all, but I found that a USB keyboard worked fine.
Commodore 64
There's two flavours to select from:
- C64 MiSTer (I'd imagine came from the MiSTer core)
- Commodore 64
The OSD menus are slightly different between the two, the MiSTer one offering slightly more options - mostly under the video, audio and tape control, but note that both options are in spanish (I've not found a way to change the menu as yet).
Going from a YouTube video a good configuration for audio is:
- SID Izquierdo 8580 (SID left: 8580)
- SID Derecho 6581 (SID right: 6581)
- SID Derecho Addr Ingual (SID right addr: same)
- Expansion de Sonido No (Sound expander: no)
- Mezcla stereo no (Stereo mix: none)
You can load disks and carts. To load a disk, bring up the OSD (F12) and select the .D64 file you want (I've been enjoying Neptune Lander Elite), then from the prompt:
LOAD "*", 8
Then wait around a minute or two until LOADING is complete and READY. is shown. Then use RUN.
Note that apparently joystick ports can be reversed depending on the game - so if the joystick doesn't work, try switching it over to port 2.