There are a lot of tutorials on the web for Service Workers (many of which are very good), but there's a lot of reading too. So, this is me throwing my hat in with the fast and loose: copy & paste guide.

MY EBOOK£5 for Working the Command Line
Gain command-line shortcuts and processing techniques, install new tools and diagnose problems, and fully customize your terminal for a better, more powerful workflow.
£5 to own it today
This post assumes that you already run your own website and want to start making use of Service Workers. To get started, you'll need:
- Your site served over HTTPS (I'd recommend using CloudFlare for ultimate copy & paste)
- A bit of JavaScript to load the service worker
- The service worker (that does all the network control and whatnot)
🔒 HTTPS
You can do the whole hog with HTTPS, get yourself a certificate...etc, but to shortcut all that nonsense: get yourself a free CloudFlare account.
Then add a new website. What this will do is scan your DNS for all the existing records and make it a simple job of giving CloudFlare control of the domain.
Then in your own domain registrar, point the name servers to CloudFlare (which you'll get once you've completed adding your site).
CloudFlare gives you a free SSL certificate for your domain (and all sub-domains).
The SSL says it takes 24 hours, in my experience, it's about 2-3. Once it's assigned, you might have to select flexible as the SSL (this means your user facing domain is green-lock SSL, but between CloudFlare and your server, it's speaking unencrypted HTTP).
🔨 Bit of JavaScript
Put this code on your site (so that it appears on every page):
<script>
if ('serviceWorker' in navigator) {
  navigator.serviceWorker.register('/sw.js');
}
</script>
Put this inline to your HTML (it makes it simpler).
Disclaimer: this is scoped to the root of your site. Read a non-copy & paste article to learn more!
🔋 The service worker
Put the following code in a file called sw.js and put that in the root of your web site (so that https://yoursite/sw.js would load) (you can put this somewhere else, again, read a more detailed post!).
// we'll version our cache (and learn how to delete caches in
// some other post)
const cacheName = 'v1::static';

self.addEventListener('install', e => {
  // once the SW is installed, go ahead and fetch the resources
  // to make this work offline
  e.waitUntil(
    caches.open(cacheName).then(cache => {
      return cache.addAll([
        '/',
        /*
          DEAR READER,
          ADD A LIST OF YOUR ASSETS THAT
          YOU WANT TO WORK WHEN OFFLINE
          TO THIS ARRAY OF URLS
        */
      ]).then(() => self.skipWaiting());
    })
  );
});

// when the browser fetches a url, either response with
// the cached object or go ahead and fetch the actual url
self.addEventListener('fetch', event => {
  event.respondWith(
    // ensure we check the *right* cache to match against
    caches.open(cacheName).then(cache => {
      return cache.match(event.request).then(res => {
        return res || fetch(event.request)
      });
    })
  );
});
The contents of the sw.js file will need to change to trigger an update of the sw.js file itself, but I highly recommend using the debugging tools too.
To understand how refreshes work (aka the lifecycle), Jake Archibald has a 3 minute video to help.
Important: if you use a CDN like CloudFlare in front of your site, make sure to remember to tell CloudFlare to exclude your sw.js file in it's aggressive caching strategy.
🐛 Debugging
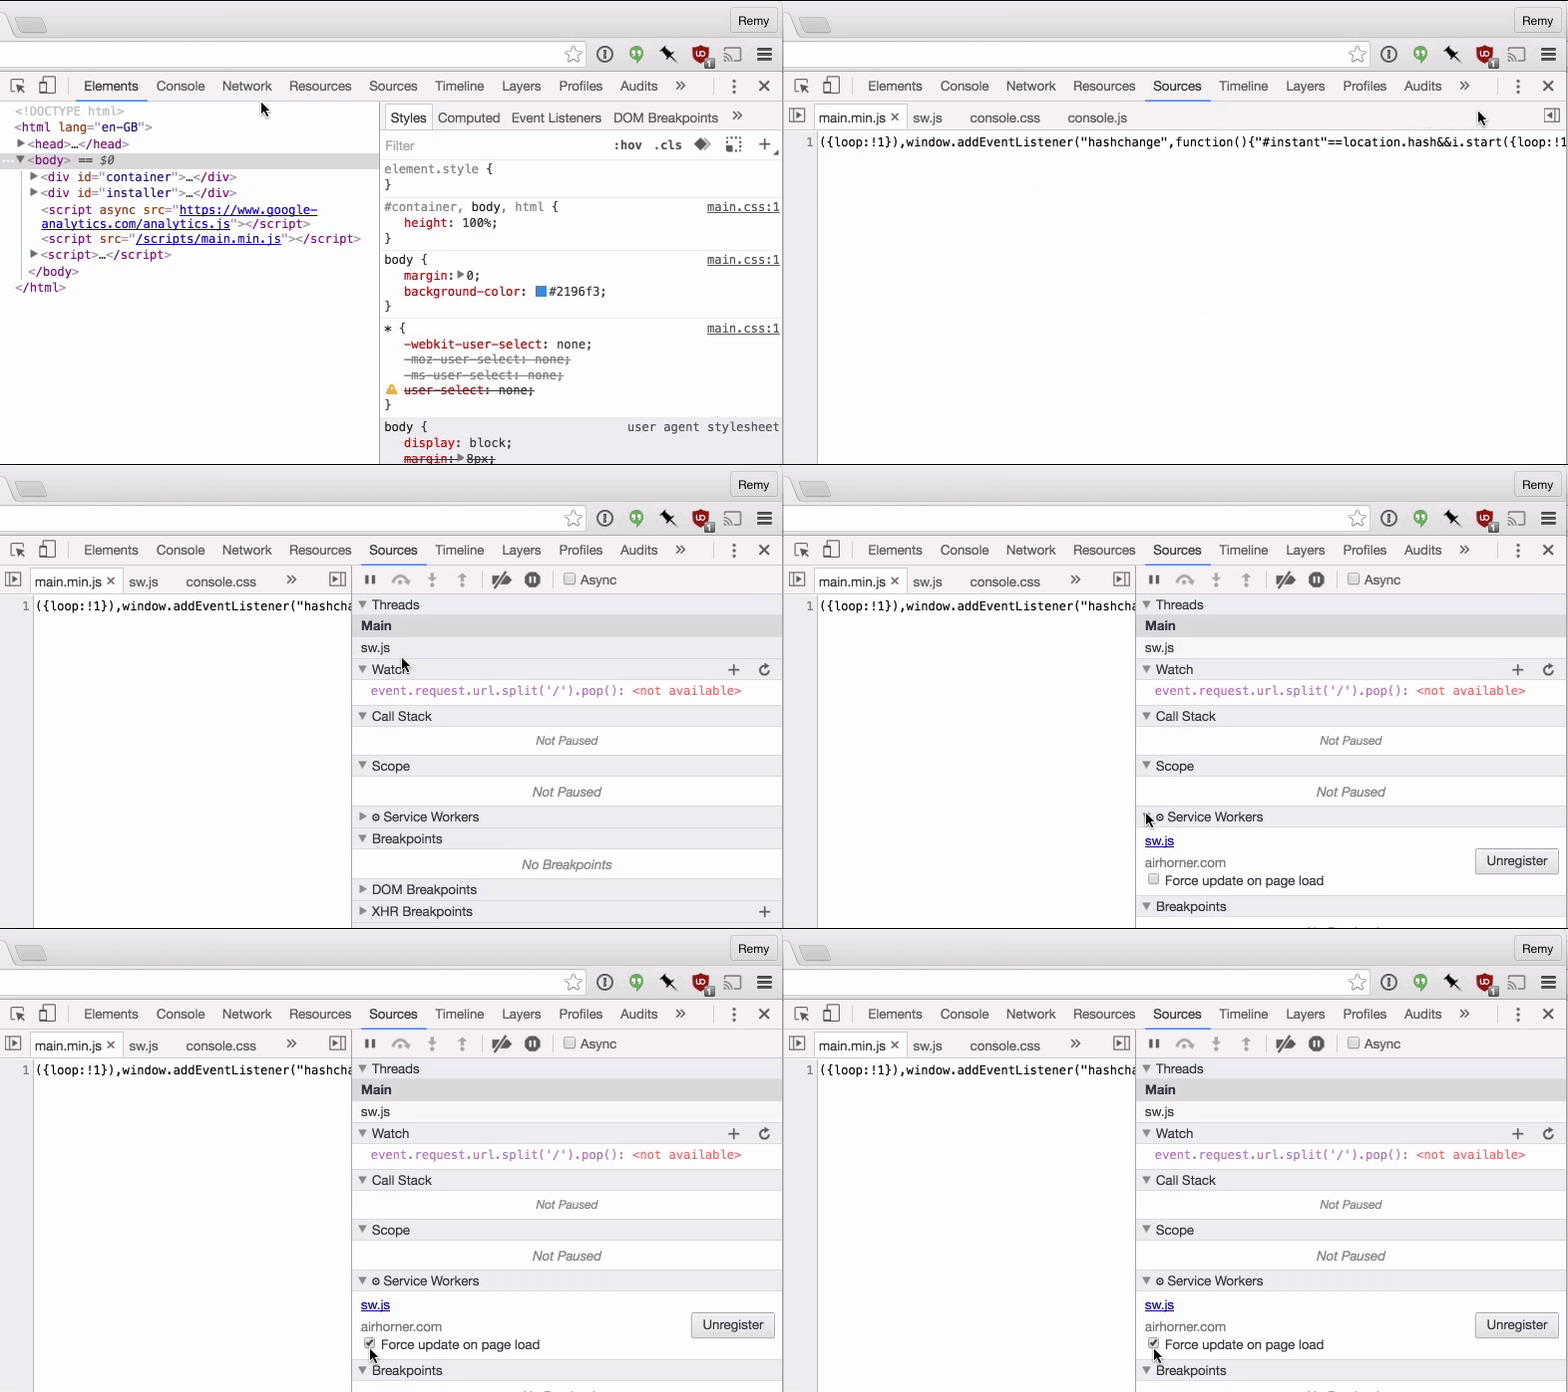
Firstly, use Chrome Canary, you'll get more life out of it for debugging. Secondly, enable the "force update on page load" (which is tucked away, and does randomly unset itself, so watch out!):

Enjoy, and do make sure you read some more detailed articles. Here's my recent service worker efforts in action on jsconsole for your pleasure.